Arcade
From the 70s to today, the design is iconic. These machines defined many childhoods.
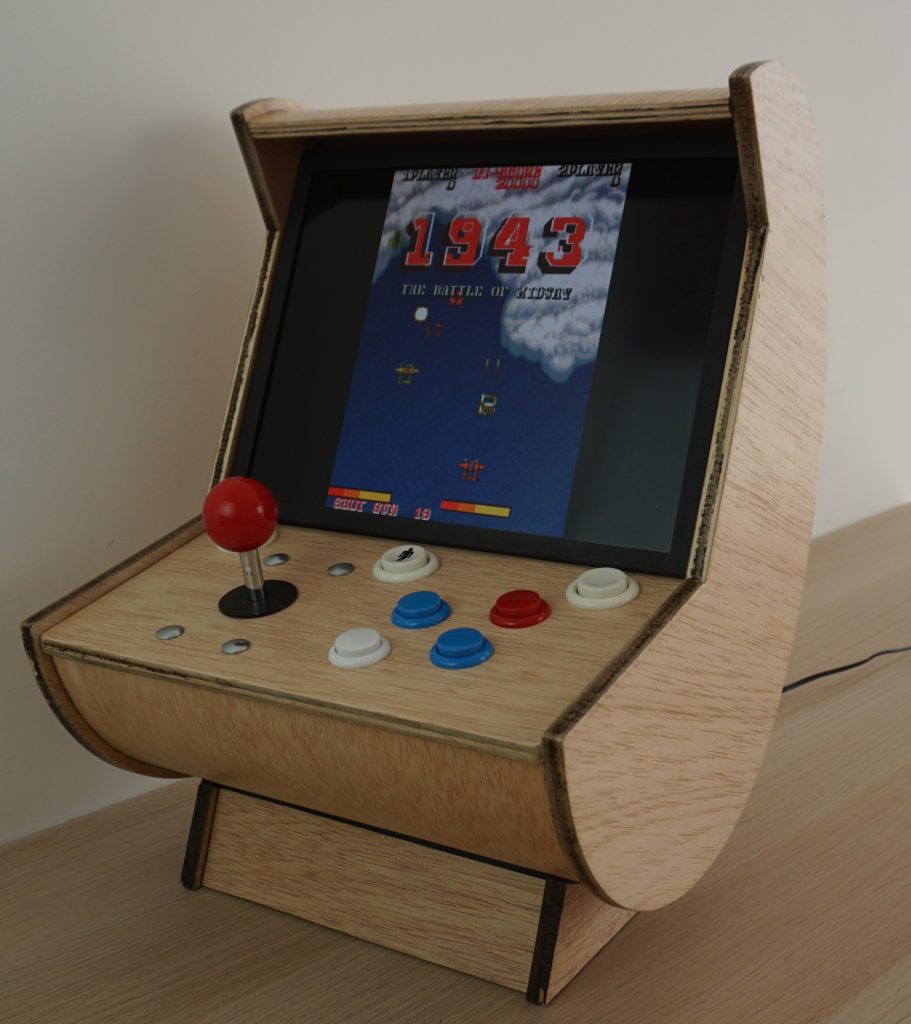
And now a modern reiteration of this machine. With basic arcade components, availability of any console game and Japanese-inspired machine design.

Modelização Final
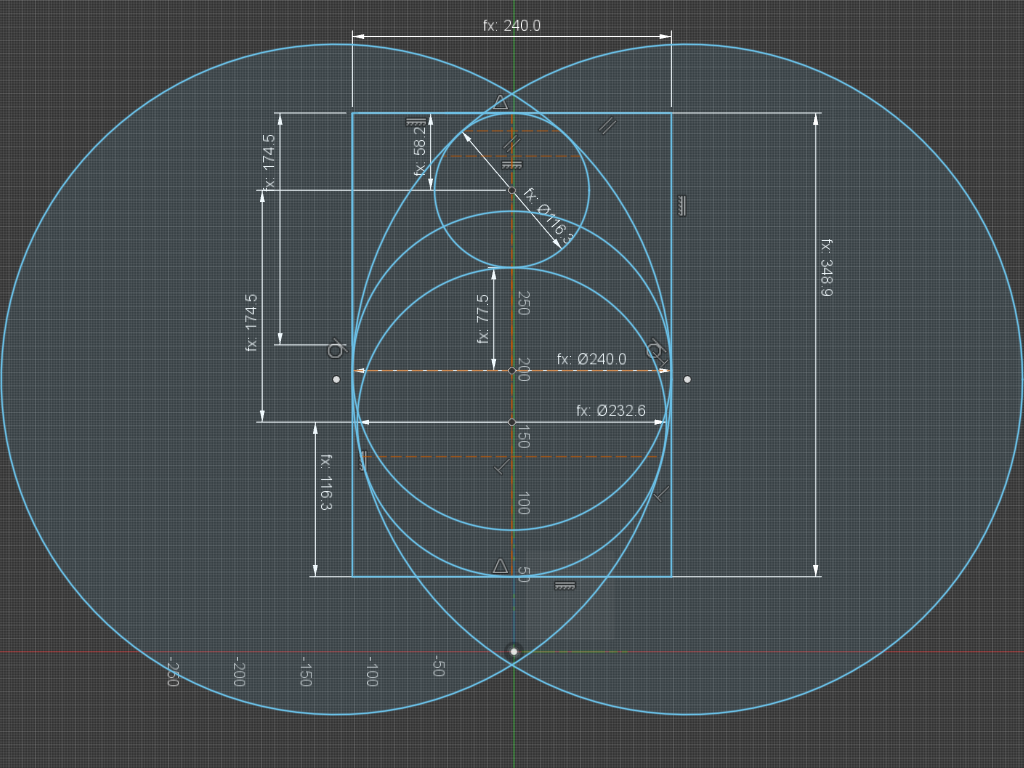
This second version was created through measures dinamicas resultantes das relações entre distancias e diametros das forma geométrica. Inspiradas por aquela de um ovo.
This makes it possible to create different models by changing the height and width.
Back Mold
To create the back of the machine it was necessary to print wooden formwork, cut and fold a galvanized sheet as a mold for the concrete.
Then cement, water and inert materials are mixed to fill the inside of the mold with concrete.
After drying, the formwork is removed and used to hold the sheet, leaving American glue behind.
Costas Colagem e Corte
To glue the back, you need 3 3mm plates. This is because using just one results in the plate becoming more fragile and not having as smooth a curvature and without bends or fractures.
The pattern used allows the plate to have a large amount of mobility whilst keeping one side of the plate intact.
Once glued, the back is placed on the cutting template with the correct distances for cutting. In this mold, 4 assembled pieces of wood were made. Two for the sides, and the other for the cutting saw stops.
After cutting the board, the back is sanded on the inside and on the cut edge.
Foot
The foot is made with seven total pieces. This is because the sides have stops that serve as support for the base. This is 3mm from the end of the foot so it can be sealed with a 5mm rubber strip for better grip. aderencia.
For greater stability of the machine, the inside of the foot is coated with glue and filled with cement.
Components
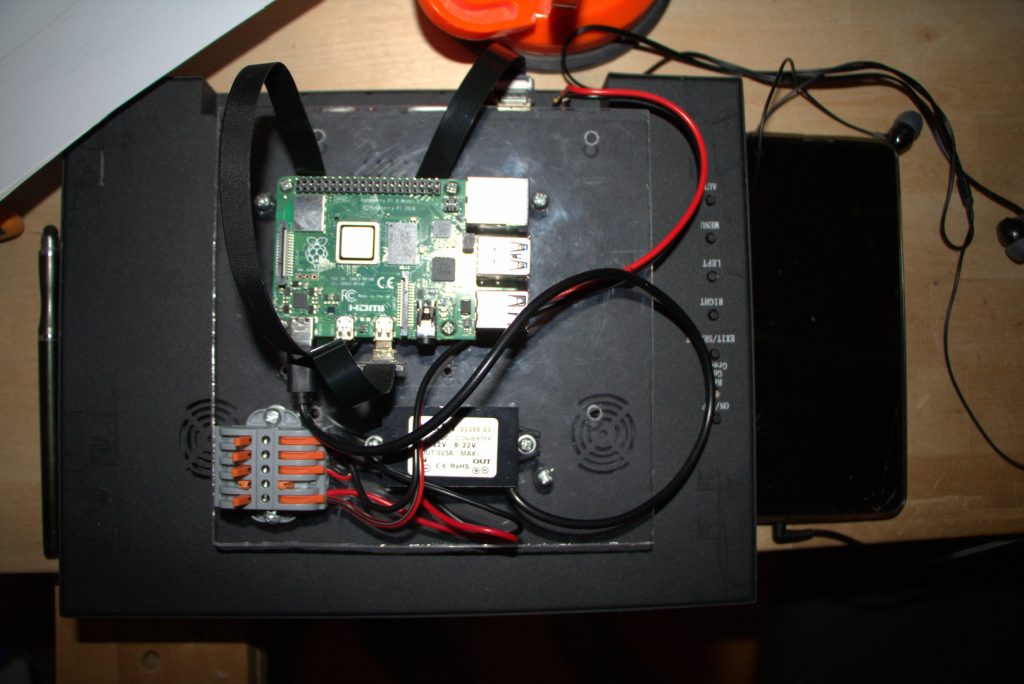
The machine does not need sound speakers because the screen (LCD) has built-in sound. As a singleboard it was used a processing component um Rasbbery PI 4 modelo B.
As physical support for the components, a PVC plastic plate with holes was used to hold the Rasberry PI to the screen.

Packaging
For transportation, it was built with the intention of shipping to the buyer, but in the initial case, for shipping to ESMAD, which denied the possibility of receiving Arcade.
For construction, a structure was made made up of wooden beams, lined with OSB boards. The interior was lined with extruded XPS polystyrene sheets as insulation and protector for transport. My personal logo was spray engraved on each side of the box, using a mold.
Software
For the software I used one of the best game emulators, Recalbox (https://www.recalbox.com). Making it possible to emulate MAME, NintendoDS, PS1, GAMEBOY, and others.

Unboxing
It was decided to make a demonstration and instructional video on how to open the shipping box, how to connect and use the Arcade.
Acknowledgements and Thanks
Finally, but without any less importance, I have to list the people who helped me bring this project to fruition. My family, more specifically my father, Professor Filipe and Professor Sofia.
